filmmaker

How to compress a video for internet?

Reduce size without loss in quality. If you’re using a professional NLE, then I recommend you compress your video from it.

If you don’t have access to professional tools, use Handbrake. Well, actually, even if you have professional tools, try it – sometimes it does better.


Youtube and Vimeo settings

What does Youtube and Vimeo have to say? First, check out their specifications:

Youtube Advanced Encoding Settings

Vimeo Video Compression Guidelines

 
In the case of Youtube, they recommend a minimum of 8 Mbps for 1080p videos, but would prefer 50 Mbps if you have the Internet connection to swing it.

In the case of Vimeo, they recommend at least 10 Mbps for 1080p, and ideally 20 Mbps if you can swing it.

The question is: Can you swing 10 Mbps or more? Most consumer Internet connections have fast download speeds, but slow upload speeds. At 4 Mbps upload, you will need to wait for 2.5 times the video duration for your upload to complete (assuming your video is compressed at 10 Mbps). What if your video is compressed to 20 Mbps? A five minute video being uploaded at 4 Mbps will take 25 minutes and will be 750 MB. A five minute 50 Mbps video will take an hour to upload and will be about 1.8 GB. A 50 Mbps video that is an hour long will take about 2.5 days and be 110 GB.

A slower Internet connection means more time to upload. If your video is really important, that’s what you should aim for. Look at your limitations, and work backwards. Don’t compromise quality by being in a hurry.

Okay, so why did I say 20 Mbps might not be good enough?

Youtube and Vimeo will further compress your videos if they see fit. You usually have no choice in this regard. I’ve found they further compress your videos by half. E.g., 1080p videos tend to become 5 Mbps and 720p videos tend to become 2.5 Mbps or so. It’s their ‘secret sauce’, which ruins our recipe! I mean, isn’t it easier for them to tell us to encode at their preferred data rate and let us manage the compression? We’re doing it anyway, right?

Here are some other settings to look out for:

Progressive scan (no interlacing) only. Leave interlacing to broadcasters.

Color bit depth is 8 and chroma sub-sampling is 4:2:0. Color space is Rec. 709, though it should be sRGB (the differences are negligible so don’t worry about it).

High Profile H.264 instead of Main Profile.

2 consecutive B frames, which means a keyframe every third frame.

Closed GOP. GOP of half the frame rate. Choosing the keyframe or I-frame frequency lets you control this.

CABAC – it’s just another level of coding that gives you better quality, but takes more time to encode.

Variable bit rate if possible, though I highly recommend Constant Bit Rate (CBR) if you don’t care about the file size.

Audio is AAC-LC, sampled at 48 KHz, at 384 kbps (stereo) or better.
 
As far as data rate is concerned, try your best to go as high as possible, with 50 Mbps being the benchmark. If your data rate is lower than this, you lose control over your quality. You should always test your videos in small chunks – don’t get lazy.


Director's Guide to Color Grading

Sure, you thought about your edit, visual effects, and music during pre-production… but you overlooked color correction.

This happens often, yet color is an incredibly important part of any film—a huge driver for mood and tone. How can directors and cinematographers maximize their budgets, collaborating with colorists to make their films look the absolute best for any delivery format?

“A lot of people underestimate what it takes to have something color corrected,” says Sal Malfitano. “You don’t want to spend your entire post budget fixing things when that could go towards enhancements instead.”

Best advice to filmmakers looking for great color on a reasonable budget.

  1. Consult a Colorist Early

Independent moviemakers should get in touch with a colorist and post-production house early on to begin talks for the look of the film. “Even if you don’t wind up working with them, it’s good to get a colorist’s point of view as you’re preparing to shoot,” says Malfitano, who recently graded the Safdie Brothers’ Heaven Knows What. “Many post houses and colorists are happy to advise filmmakers at this point to start building a relationship.” He recommends sending over footage and stills to a colorist as the project progresses, so that he or she can test out some looks.

In the case of The Invisible Front, director Vincas Sruoginis’s passion project about the Lithuanian Partisan Resistance’s armed struggle against the Soviet Union from 1944 to 1953, Nice Shoes’ Lenny Mastrandrea was brought on early in the creative process.

“We worked together with our visual effects artists to blend reenactment footage shot on a Sony XDcam with footage shot on 16mm film,” says Mastrandrea. “We were able to anticipate the needs of the film because Vincas met with us before the project was even close to being shot, which helped us marry the different sources.”

So what should you discuss with a colorist at the outset?

  • Camera: Let your colorist know what camera (or cameras) you’ll be working with, so he or she knows what file formats to prepare for.
  • Look: Being able to convey what you want visually is key early in the conversation. Bring references so that you and the colorist have something to look at.
  • Schedule: Give the colorist (and every member of the post team) a sense of your overall schedule. They can help budget the proper amount of time for color grading.
  • Budget: Each project will have different budgetary limits. Don’t be embarrassed about yours—be upfront. Most post houses will develop a schedule with you that accommodates your needs. The better prepared you are before you start color grading, the more bang you’ll get for your buck.
  • Final deliverables, like format and resolution: Your film might be shown in multiple formats (cinema, web, television, archival), so try to include a rough plan of the mediums you’re planning to exhibit with.
  •  
  • 2. Reference Film History
  • Chris Ryan appreciates a director that can speak in the shorthand of other films. “Having worked on a range of Criterion transfers [such as 8 ½, Gimme Shelter, and Richard III], I love talking to filmmakers who have an appreciation of film. When someone comes in and can give me a film that they’re looking to reference, that really helps me better understand what they’re going for.
  • “Look at Young Frankenstein as an example. Mel Brooks really wanted it to look like the originalFrankenstein films. Brooks and the DP, Gerald Hirschfeld, spent months testing film stock, lighting and cameras to make their film look just like old Universal films. Go shoot something, give it to a colorist, and get advice on the look you’re trying to achieve.”
  • Make Color a Part of Art Direction
  • No aspect of moviemaking is an island. Your cinematography and art direction should cooperate with color correction to produce the best results.
  • “I can work with you to make a scene ‘blue’ in post,” says Ryan, “but if you’ve already worked with the cinematographer, the gaffer, and the art director to establish a number of blue elements on-set, the finished project is going to be so much richer. Go out of your way to shoot with a yellow filtration if you want a yellow look in a scene. I can go in afterwards and give a scene an amber quality, but it would look far better if you actually lit it with amber lights.”
  • “You don’t want to come in saying you want a really colorful film when all of your locations and sets were devoid of color,” says Malfitano. He found that while collaborating with Joshua and Benny Safdie on Heaven Knows What, an uncompromising portrayal of heroin addicts in New York City, the aesthetic that the directors had captured on set with their cinematographer, Sean Price Williams, provided a very strong foundation for the color grading process.
  • “Joshua, Benny and Sean were looking to create a hazy, milky look, one that was flat but not flat, and desaturated but not too desaturated,” says Malfitano. “There is no true black in any of the film, which reflects the world these characters inhabit.”


  1. Prepare for Post-Production

“Proper preparation, at any point in post, will make it easier for everyone,” says Mastrandrea. “Prepping or fixing media costs valuable time that could be spent on developing the look of the film.”

If you intend to work with the original source footage, then your editor needs to ensure that the EDL, AAF, or XML files correlate to the raw footage and not any transcodes that have been created along the way. Make sure that the transcodes created for the editorial workflow are managed properly, and that the file names and timecodes reflect the original files. Project frame rates should match across the pipeline. If you’re unsure about the quality of the preparation, regular communication with the colorist is key. Most are happy to test material to make sure it’s in a workable state, and help you to get it where it needs to be.

Malfitano suggests anticipating how the film will be shown. “Have an idea of what kind of deliverables you’ll need at each stage of that process: from the copies needed for submission to what the festival requires if your film is selected. Big-budget films have the luxury of being able to tweak for a theatrical run and for Blu-ray release, but a good colorist can work with indies to craft a deliverable that’ll look good on any platform.”

“Factor in the delivery date of the film, too,’ he adds. “Work backwards from there to allow for at least a month of collaborating with your colorist.”

  1. Test Color Throughout the Process

As Ryan color-graded with Bassam Tariq and Omar Mullick on These Birds Walk, a documentary about the struggles of street children in Karachi, Pakistan, the filmmakers found that their initial vision for the color of the film wasn’t working.

“We used color swatches they had brought in as a guide to start with,” says Ryan. “But as we started to apply that look to a few scenes, we found that the muted palette was making a story that was already a little sad, too sad. The color needed to be a little bit more uplifting. After Bassam and Tariq screened the scenes we had graded for a few people, we went with a natural look that emphasized the hopeful feel of the film, working to bring out the colorful beauty of Pakistan. Bassam and Tariq were apologetic about starting off down the wrong path, but that’s what’s interesting about color.”

“A lot of times people get used to their rough cuts. They think that’s what they have,” says Gene Curley, who recalls working with directors on two recent projects to discover the look of their films. “Robert Vorkahl’s upcoming feature, Completely Normal, was beautifully shot on the Arri Alexa by cinematographer Brian Harnick. The raw images came up really clean and getting a nice balance of color was easy. But Vornkahl wanted the look of the film represent the unglamorous, tedious lives of the protagonists. So we actually skewed colors and washed the whole look out to give it a more desperate, bleak feel.

“The Graham Parker documentary Don’t Ask Me Questions by Michael and John Gramaglia, on the other hand, was a lot of older multi-format footage from concerts, interviews, and various performance pieces. John wanted a uniform look. By maintaining a consistent level of contrast and saturation throughout and cleaning up all of the whites, we were able to achieve a distinct look throughout the film despite the difference in quality of source material.”

  1. Good Color Correction can Save Your Ass—and Budget

Not sure you can pull off that crazy ambitious lighting maneuver on set? Remembering that your colorist can be part of your lighting crew may save you time and money in production.

“A colorist can almost be a gaffer working for the DP,” says Ryan. “We can achieve many lighting effects in a color grading suite that would be costly or time-consuming on set. A lot of times these things were impossible due to any number of issues: bad weather, time, talent schedules, and so on.”

That says, Ryan cautions against the dreaded “fixing it in post” mentality. “We can’t help out as much if a filmmaker captures footage in a specific location, at a specific time of day, and then tries to work in pick-up shots from a different time or lighting setup. A colorist can match the overall tonality, but can’t compensate for drastic lighting changes.”

  1. Don’t be a Helicopter Director

Finally, leave some space for your colorist to breathe. Once a filmmaker has gone through the film with the colorist and set the looks for each scene, it’s time to let the film go for a bit. Because of time constraints, it’s often better to let the colorist work alone, and then come back for one or two supervised sessions for any final adjustments.

“Once we have a clear direction, it’s just a matter of taking the time to apply that color throughout the film,” says Mastrandrea. “As long as I have a clear understanding of the film, I can really focus on making it look beautiful.” MM

This article appeared in MovieMaker‘s Spring 2015 issue.

4K Monitor for Digital Cinema Colour Grading - ColorEdge cG318-4k review

cg318-4k_screen_size.jpg

The ColorEdge CG318-4K appears to be Eizo's play for both its traditional market of particularly exacting stills photographers and for that part of the film and TV business.

Eizo has had an enviable profile among print and design people for a while, famous for displays which achieve more or less everything that the underlying technology possibly can. The CG318 doesn't (can't) have the same contrast ratio as an OLED, but it really does have absolutely everything else. The basic spec list is a worthwhile place to start: with a full 4096 pixels per line, it's a display of about 1.9:1 aspect ratio and capable of displaying not only the most enormous workstation desktops but also a full digital cinema 4K image, not just 3840-wide quad HD as with many monitors described more casually as 4K. Perhaps more importantly, the sheer physical size of the thing, at the best part of 32 diagonal inches, begins to make 4K readily viewable in a way that 24" quad-HD displays only really do if we lean in and squint.


Impressive contrast

The thing is, figures near £3000 are mentioned, which is potentially a lot for a monitor when Dell's UltraSharp 32 display, at less than half the price, is also an option. In the end, though, the CG318 starts making Dell look quite expensive, given the yawning gap in feature set. For a start, Eizo mentions a 1500:1 contrast ratio; this is both technologically feasible for a very high quality IPS TFT and readily believable in practice.

Just as a subjective observation, the amount of contrast from the CG318 is literally eye-watering. Selecting the sRGB preset, (much more about sRGB below) and cranking up the variable backlight theoretically puts the monitor way out of calibration, but boy, does it look pretty to the untrained observer. Just as a demonstration of sheer dynamic range, this setup produces a display which doesn't even begin to approach the sheer power of Dolby's HDR displays, but suggest what a practical, affordable home-user version of it might look like. In a darkened room, sunset shots are squintingly bright and blacks remain solid. The backlight only goes up to 300 candela per square metre, which is pretty normal for desktop displays, but the point is that the CG318 serves as a particularly keen example of something that's increasingly well-understood as time goes by: dynamic range isn't really about maximum white brightness, it's at least as much about minimum black brightness.

What's your angle?

While we're discussing contrast, we should talk about viewing angles. Naturally, as a TFT panel, the off-axis performance of the CG318 does vary very slightly. Within that limitation, though, performance is very good. The display enjoys a wide range of viewing angles with consistent colorimetry. Beyond that range, the image just seems to dim slightly, with none of the purplish or whitish glare that becomes obvious on many other IPS TFTs.

Colourspaces

So far, so good; the Eizo CG318 is an exceptionally good full-4K, high contrast TFT monitor, which at £3000 probably wouldn't raise too many eyebrows. What makes the display particularly interesting for film and TV people, however, is that unlike a lot of cheaper options, it has built-in support for not only sRGB and Adobe RGB, but also Rec. 709, Rec. 2020, SMPTE-C and DCI-P3 colourspaces.

The monitor covers 98% of the vast P3 colourspace used for digital cinema work. It is therefore suitable for more or less immediate deployment as a reference display in edit suites and grading facilities, producing anything from Rec. 709 material for current broadcast workflows through to digital cinema mastering.

Other than buying one of the 4K OLEDs, this is something that could be emulated to some extent using a lower-cost TFT designed to display Adobe RGB, plus some sort of colour correction device such as a Fujifilm IS-mini, or an HDLink 4K, should Blackmagic release one. Even so, the total cost of doing this might well begin to approach the value of the CG318 and the results would almost certainly not be as good, given the high performance of the TFT panel and backlight that form the basis of Eizo's display.

Field-ready?

With the ability to upload LUTs using Eizo's supplied software, the CG318 is also more or less ready to go as an on-set monitor, suitably flight-cased and with an SDI converter to suit its HDMI and DisplayPort interfaces (there are two of each, both supporting 10-bit pictures, although the HDMI is a slight disappointment being limited to 30Hz updates). Outdoors on a bright day, the black performance versus OLED might hurt slightly more, although it's hard to see this as a huge problem, given that the CG318 has at least as much contrast as many of the TFTs that are being used for this sort of work at the moment. The lack of an SDI input is a bit of a shame, although the overwhelming majority of Eizo's customers are still photographers and graphic designers for whom the feature would be utterly superfluous.

Calibrating output

Saving the most interesting for last, the thing that makes the CG318 look like a really good deal is the inbuilt calibration. Various people have claimed calibration for their displays in the past – the Dell UP2414Q we looked at came with a calibration sheet – but the ability for a monitor to actually observe its own output is fairly rare. The CG318 includes a mechanical device which swings a sensor boom into position over the display, allowing it to genuinely measure the output from the panel and perform a proper calibration.

Now, we have to reign in our enthusiasm just slightly here: a really good calibration probe is worth more than this entire display and there may be some question over exactly how good the CG318's inbuilt probe can really be for the price. Ultimately, without access to an advanced optical lab, it's difficult to qualitatively assess the situation, so I won't, but at some point, this is likely a better solution than calibrating once at the factory and hoping. Perhaps most significantly, the demo monitor is naturally brand new and the real value of a calibration probe is in ensuring that things remain in trim as they age. Comparison against a really good probe after a few years' hard use might be in order (Eizo warrants ten thousand hours or five years); shall we meet back here in, say, 2019 to discuss?

Conclusion

Overall, the CG318 is spectacular. It is impossible to avoid the comparison with OLED; the CG318 isn't one, but then it's something like two thirds the price of even an HD OLED, and it has inbuilt calibration. There will always be a market – high end film finishing in particular - in which the only fashion dictates that the only acceptable monitoring is either projection or a Sony OLED, but outside that area, in places where purchasing decisions are based on capability not branding, really good 4K monitoring is made a lot more accessible by the existence of this display.

TIPS : HD CAN LOOK LIKE 4k

I think people who make videos and films are sometimes a little unclear about the relationship between 4K and HD. The most important message is this: that 4K is four times the data rate of HD, and you’ll need four times the space to see it.

But while there are four times as many pixels as HD, but the picture is not four times better. It’s actually only twice as good, if you measure the “goodness” of a picture by the number of pixels in a straight line.

Just to be completely clear about this, 4K has only twice the linear resolution of HD. This has some very important consequences.

Perhaps the most important of which is that if you degrade the sharpness of a 4K image by as little as just over half a pixel, you might as well have started in HD.

Half a pixel! That’s one eight thousandth of the width of the screen. You do’t have to have much wrong with your picture to lose its 4K-ness in an instant.

Remember that when we judge the sharpness of a picture, we’re not actually measuring it. What we’re absolutely not doing is counting pixels and how they merge with their neighbours. We base our impressions of sharpness on - impressions. We can be fooled into thinking that a picture is sharper than it is.

How does "sharpness" work?

Do you know how the “sharpness” control works in Photoshop? Well, I’m pretty sure that it’s evolved into something quite sophisticated, but the basic principle is rather simple. Our perception of how sharp an image is depends on edges. The more distinct edges we see, the sharper we think the picture is. When we sharpen a picture, we’re not adding information. How could we be? If adding information was that easy then I could just write half this article and move the "detail" slider another fifity percent and it would be finished!

What we’re doing is saying “whenever you see an element in the image that is changing more rapidly than the others, make it change even more rapidly".

 Make it sharper, in other words.

The sharpness of an image depends on frequency response. That probably sounds like it should be in an article about audio rather than video, but there’s really no difference. Think of a chessboard. If you were to scan a laser beam across the surface and measure the reflections, you’d essentially get no reflection from the black squares, and a 100% reflection from the white ones. When you move from black to white, the change should be instant, subject only to the width of the laser beam.

That instantaneous change represents a high frequency at that instant. Whether you actually see an instantaneous change depends on the ability of your recording, transmission and display system to reproduce it.

High frequencies mean more information. If you want to reproduce twice the frequency, then, in a digital system, you have to have twice the sample rate. That means twice the data. One of the easiest ways to reduce data rates is to limit high frequencies. In a sense, all you need to reduce your data rate by half or more is to introduce a low-pass filter (one that only lets lower frequencies through). Most recording, transmission and display systems do this anyway in the way that they handle the information and it’s certainly a fundamental aspect of the way that most codecs work.

Let’s go back to the chessboard. What’s the effect of filtering the high frequencies out? The edges between the squares look blurred. They look like that because there’s less information to describe exactly where they are. Remember: sharpness is all about information.

Artificially boosting high frequencies in an HD image can make it look significantly sharper - enough, perhaps, to make it look like it’s 4K.

Post produce at 4K

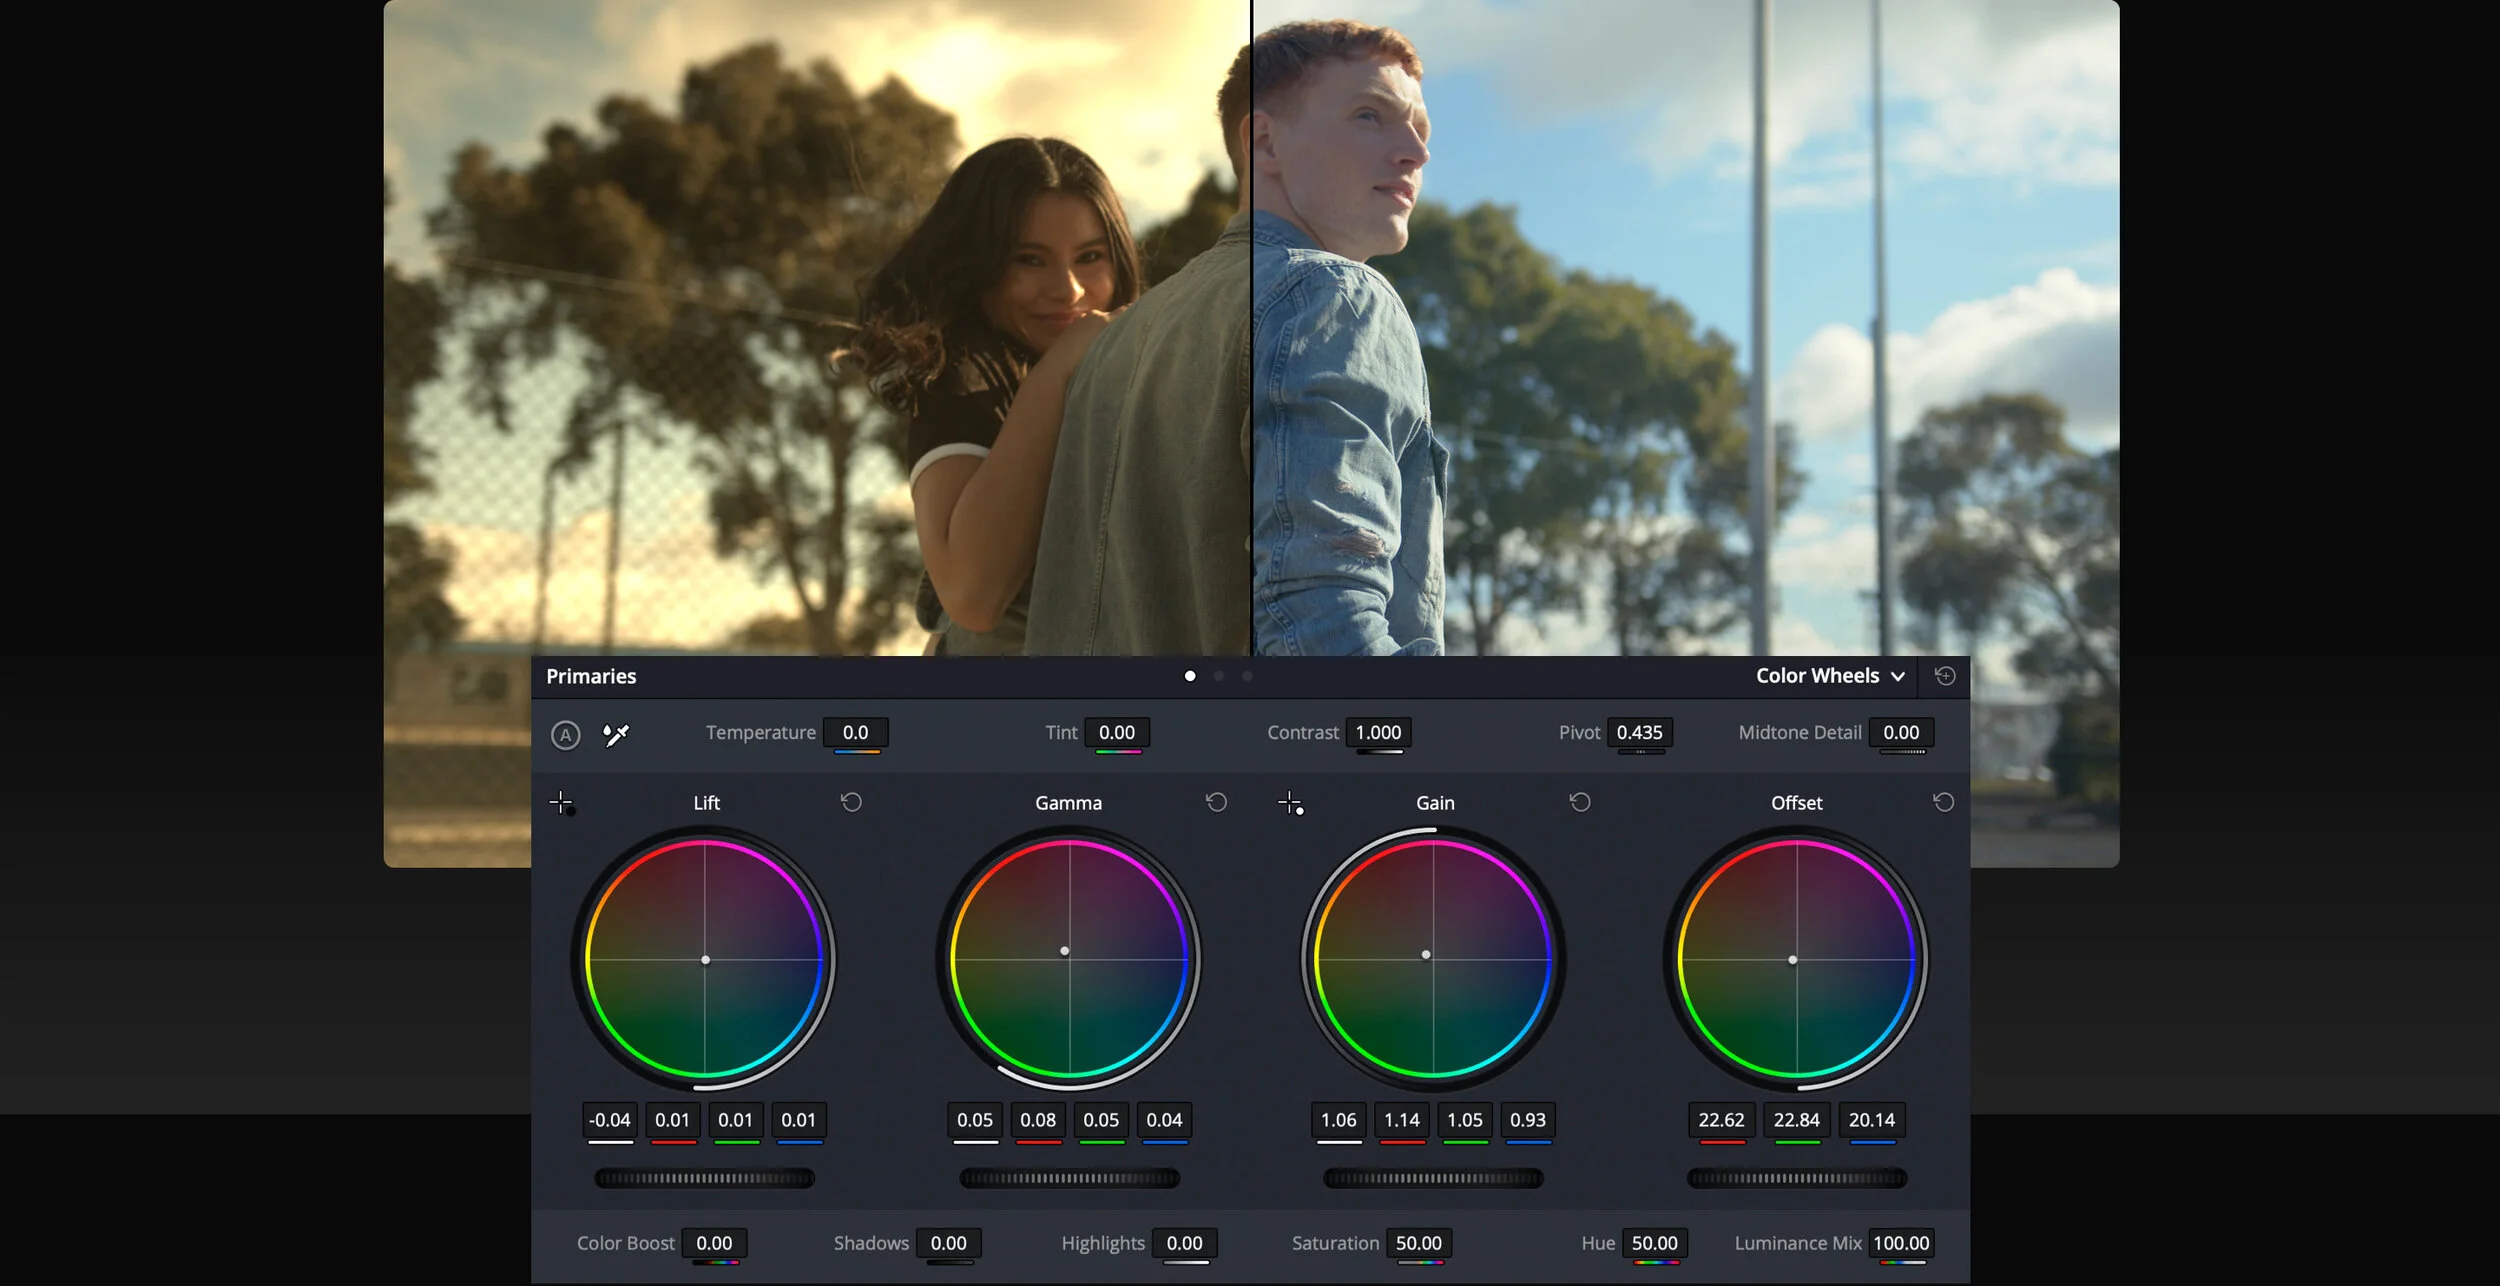
Another way you can sneakily bounce your HD material into the 4K domain is to post produce it at 4K resolution. Again, it’s not going to magically capture 4 times the number of pixels but any effects you do will be in 4K.  For example, you might want to apply a look or some kind of artistic effect. To the extent that the effect changes the pixels, it will “create” new 4K ones. This isn’t magic: it’s an illusion, but it’s a valid one.

You can also add “clues” to 4K resolution by adding titles. These will be rendered at whatever resolution you set your project to. So if you set it to 4K, your titles will be at 4K, whatever the original resolution of your material.

But, do you know the best way to make your productions look like 4K?

Shoot them well in HD.

To "shoot well" you have to pay attention to quite a lot of things.

For a start, use a good camera

That should do without saying, but it often doesn't. It doesn't matter if the camera says 4K on the tin; if it's not a good camera (which can mean a number of different things) then however hard you try to get everything else right, it's not going to make your HD look like 4K.

Expose correctly

Especially if you're recording to an 8 bit codec, you need to make sure you're using every one of the available bits for distinguishing between light and dark pixels.

Light correctly

Personally, I've never understood the obsession with low light performance of a camera. Just because your device can capture video by candlelight doesn't mean you should skimp on lighting! There's more to lighting than mere quantities of photons landing on sensor elements. There's the direction they're coming from, and the overall contrasts in the scene. If you're going to the trouble of lighting a scene, you might as well do it, you know, brightly.

Use good lenses

If your lenses aren't sharp, then your video isn't going to even look like HD - never mind 4K. And make sure you know how to focus with them: basic, yes; but often overlooked.

Use a smaller sensor!

I know this cuts across what is probably the biggest trend in film making of the last five years, but, honestly, I'd rather get the shot than have to discard sixteen takes because they're out of focus. Shallow depth of field is just one of a multitude of cinematic effects. It's not a panacea and in the wrong place at the wrong time it can be an absolute menace. Any number of times I've captured an image only to find out that the tip of the subject's nose is in focus while their eye lashes are blurred.

Of course big feature film budgets allow for experienced focus-pullers. But if it's just you and a DSLR, who's going to pull focus for you? And without proper cinema-type markings on the lens, it's going to be largely impossible anyway.

 It's a good idea to try to record at high bitrates, or uncompressed. You can do either of these if you have the right type of external (HDMI or SDI) recorder. Most external recorders will record to 10 bit ProRes at up to around 220 Mbit/s. It's an edit-friendly format, with every frame encoded individually so there's no dependency on previous frames, and recording in 10 bits gives a significant amount of additional headroom for post-processing, even if your original signal was only 8 bit.

HD rules in the cinema!

There is a camera that pretty much puts all of this (apart from the bit about the small sensor) into practise. How many times have you heard that Skyfall, Hugo or Game of Thrones wasn't sharp enough? Exactly none, I would imagine, even though, with the exception of Game of Thrones, which was made for TV (widely praised for its production values), these films have been seen on the biggest screens and scrutinised by the most critical of critics. Absolutely none have said it's not sharp enough for the cinema.

What this proves, I think, is not only that HD is good enough, but that it can functionally substitute for 4K and no one is any the wiser. There are far more important elements that make up a picture than the sheer number of pixels. Your brain does a lot of the work.

Think about your school playing field, or your favourite park when you were growing up. Zoom in on the grass so that you can see the blades waving in the wind. Now focus on a single blade of grass. Look at the markings, the nature of the edge; how it reacts when it catches the sun.

Were you able to do that? Most people can. It's incredible (literally) when you think about it. And absolutely none of that thought experiment has anything to do with resolution.

As we've said before, if you can acquire in 4K, then do so: it's able to make HD look better when downsampled: turning 4:2:0 into 4:4:4 for example.

But if you shoot in HD in the right way, taking all the steps mentioned above (and some, undoubtedly that we haven't mentioned) then you can put your HD material on a 4K screen, and still enjoy the view.


Learn Depth of Field with this Powerful (& Free) Online DOF Simulator

A Polish software engineer (and amateur photographer) named Michael Bemowski recently put together one of the most helpful depth of field tools out there, and the best part is that it's completely free. The tool, which you can find here, allows you to manipulate every camera and lens setting that affects depth of field, from sensor size to focal length, from aperture to the distance between the subject and the camera. Plus it gives you a handy visual approximation of what each specific set of parameters would look like in a real world setting.

n order to make this tool as accessible as possible, you can download a version of it that runs offline on any operating system, and there is a dedicated mobile version as well, so you can access it anywhere at any time. 

NUCODA

Nucoda colour grading and mastering solutions have been used on many of the best known films, commercials, documentaries, music videos and television programs around  the globe.

Nucoda

The premium colour grading and finishing solution for feature films, commercials and broadcast applications.

Nucoda combines a creative tool set with a very tight integration to the Avid workflow, including full support for Interplay. Setting new standards in the highest quality, Nucoda is a fully featured ACES grading system, featuring HDR grading and real time EXR file format support. With an industry leading colour toolset used by clients such as Keep Me Posted, Encore, Pixar and Disney, Nucoda creates complex looks and visual styles for animation, working in 2K/4K and stereo. Included with Nucoda is a range of image processing tools called DVO Classic, consisting of DVO Grain, DVO Aperture, DVO Regrain and DVO Brickwall.


Nucoda Look

An entry level grading solution based on the industry-leading Digital Vision image science technology and Nucoda colour tools. Nucoda Look is ideally suited for use as a pre-grade assist station, either in the post production facility or on-set. It can be used as a preparation station for the Nucoda grading system to ingest or conform video or film content directly onto the timeline. It is also an excellent post-grade deliverables system.

All about LUTS

LUT means “Look Up Table.”

A LUT (Lookup Table) is essentially the modifier between two images, the original image and the displayed image, based on a mathematical formula. There are different types of LUTS – viewing, transform, calibration, 1D and 3D.

It’s helpful to think of it like a math problem: R= S+L
“R” being your result or what you want to attain.
“S” being your source or what you start with.
“L” being your LUT or the difference needed to make up between your source and your desired outcome.

In all cases of LUT use, the LUT is the means to make up the difference between source and result.((All cases assume the colorist (or you) is grading through a correctly calibrated monitor for evaluation and finishing. LUTs in no way replace proper calibration or color correction. They only assist in the process.)) It’s never the result by itself. How does this play out? I’ll layout a couple probably over-simplified examples:

Types of Lut

1D, or one dimensional, LUTs are LUTs that usually have an exact output value for a corresponding input value. 1D LUTs are limited in that they cannot alter color saturation without affecting contrast or brightness along with it.
1D Luts are excellent for setting contrast, the white point of a display, or overall color balance adjustments  but they do little to convey the complexities needed for creating a good looking image when grading.

BMCC FILM LOG - 1 D LUT Applied

BMCC FILM LOG - 1 D LUT Applied

3D, or three dimensional, LUTs are LUTs that affect a coordinate set of colors. As an example, an RGB coordinate of (0, 0, 448) would be directly transformed to (128, 0, 832). If a 3D LUT had corresponding matches for each coordinate set, the files would be large and difficult for software to use. 3D LUTs usually have a set of 17 coordinates on each axis (red, green, and blue) from which other values are interpolated to various levels of accuracy.
3D LUT places color and luma in a 3D space (often referred to as a cube) that’s much more representative of how color works in the real world. And for our purposes, a 3D LUT is much more useful for capturing and relaying complex color grades than a 1D LUT.

BMCC FILM LOG- 3D LUT APPLIED

BMCC FILM LOG- 3D LUT APPLIED


LUT Formats

There are a number of LUT formats in use today including Iridas .cube, Iridas, .look, S.two LUT, Blackmagic Gamma Table, Clipster LUT, Sony SRW LUT, FilmLight TrueLight LUT, Thomas LUTher Box LUT, 3DL, ASC CDL, CineSpace LUT, and Luster LUT. Besides inherent differences between 1D and 3D LUT files, these formats are vastly similar in that they contain lists of color values or coordinates. Iridas provides examples of some LUT formats in their online documentation.

Programs like Adobe Speedgrade, Adobe After Effects, Adobe Photoshop, and Blackmagic DaVinci Resolve support multiple formats.

LUT Bit Depth

LUTs usually provide an accuracy of 8 bits (values 0-255), 10 bits (values 0-1023), 12 bits (values 0-4095) or 32-bit floating point (values from 0.0-1.0). Most programs will create new values linearly to make up for differences in bit depth (i.e. an 8-bit LUT applied to 10-bit video) which allows for smoother color transition and reduced banding.

LUT vs. ICC

ICC color profiles are another way of changing color but are usually reserved for input (called scene referred) or output (called display referred) calibration and matching. Proper color matching requires both an input and output profile. These profiles are linked by conversion to an intermediate color space like CIELAB (L*a*b*) or CIEXYZ so Device A can reliably work with Output A, B, or C. LUTs are considered a direct transformation and are far less useful for calibration purposes unless the LUT was designed with both a specific input and output in mind.

BMCC Film Log - 3D LUT applied (Cave Dwellers) 

BMCC Film Log - 3D LUT applied (Cave Dwellers) 


Color Correction
A very common example is printing your final film to…real, actual film. Print film came in a variety of flavors and styles. Each style had different nuances in color. The film lab would have all that nuance information or be able to send you a print test to work with. That would be your final result. The colorist grades a picture on his calibrated monitor but if he were to send that to print, it could come out looking far different due to the nuances of the physical film.

So in our math analogy, his graded film is “S” and his film print is “R.” He then uses the information from the film lab or on his own, creates and applies the LUT or the “L” to get him from his graded film to the print and to have it look as intended after it’s on the physical film. After applying the LUT, his graded film may look awful on his monitor, but will come out correct on the film print.

BMCC Film Log - Color graded by Sudip Shrestha

BMCC Film Log - Color graded by Sudip Shrestha

COlOR GRADING NODE STRUCTURE IN DAVINCI RESOLVE 11 (CLIP/TIMELINE)

COlOR GRADING NODE STRUCTURE IN DAVINCI RESOLVE 11 (CLIP/TIMELINE)


Color Calibration
The other option our colorist could take is to apply his film information to his monitor first -- before starting in on his color correction -- so he’s grading as if his movie is already on film. It looks good to him on his monitor now, but if he were to grade the entire film and then upload it to the web or play a different project through his monitor, it wouldn’t look correct because he applied his LUT to his monitor first. While this is a common method to calibrate monitors for normal REC709 and P3 grading, that’s more advanced than I want to get into right now.


The key takeaway here is that LUTs are not used to creatively grade a final result, they’re used to make up a difference between a source and a result. In practical application -- with theCineStyle profile, for instance -- the LUT will let you view your footage during editing more naturally than the flat, desaturated image originally recorded. However, it’s best to remove it for final color grading and rely on your properly calibrated monitor to tell you what color it is and yourself to determine what color it should be. If not used carefully, improper LUT use could screw up your footage or limit your image manipulation options in post.

Nobody says you can’t apply a LUT for a creative grade, but be forewarned: if your shots don't match each other to begin with, they're not going to match after you’ve applied the LUT. In this instance, you’ve basically turned the LUT into a glorified color correction filter, which is not what it's intended to be.

Are LUTs perfect?

BMCC  Film Log - 3D LUT applied (Kodak 2383 D65)

BMCC  Film Log - 3D LUT applied (Kodak 2383 D65)

No, they’re not. To achieve speed, they must sacrifice accuracy. E.g., a 10-bit image has 1024 values per channel. R x G x B = 1024 x 1024 x 1024 = a billion colors. For all practical purposes, a 3D LUT cannot be one billion pieces big, or it will defeat the purpose.

Instead, what LUT generators do is define the size of the LUT to a number that achieves good approximation for practical purposes. A common number is 17 points, instead of 1024. 17 x 17 x 17 = 4,913. Isn’t this way low? Actually, no, because the human eye isn’t that perfect. The 3D LUT only calculates these points, and the rest are interpolated (also calculated, but in a ‘broad mathematical sweep’ sort of way).

There is a lot of discussion about whether LUTs are good for critical color grading work. Some people think they are a travesty, while others welcome them. One place where LUTs are definitely valuable is in monitor calibration and viewing, quick image processing on set and computer graphics applications.

When you’re choosing between a 1D LUT and a 3D LUT, go for the option that makes your life easier. Both are compromises. Sad, but true. If they were perfect, they would too large and too slow to be useful for our crazy budgets.

AJA CION SUMMER OFFER - 4K @ $5K

CION™ is the new 4K/UltraHD and 2K/HD production camera from AJA. Shoot direct to edit-ready Apple ProRes 4444 at up to 4K 30fps, ProRes 422 at up to 4K 60fps, or output AJA Raw at up to 4K 120fps. 

Each CION camera includes the following accessories as standard:

  • Handle Grip
  • Handle Mount
  • LANC collar
  • LANC cable
  • Standard Rear Door Plate
  • Alternate Rear Door Plate
  • Battery Adapter Plate
  • AC power supply

PRICE : $4995.00

For more details : www.aja.com

Free Color Grading Tools

DaVinci Resolve Lite

“DaVinci Resolve Lite includes all the same high quality processing of the full DaVinci Resolve. However it limits projects to UHD resolutions or less, a single processing GPU and a single RED Rocket card.” 

Some limits:

1) You can only work in 4K or lower resolution
2) Only process on a single GPU and a single Red Rocket Card
3) No Stereo 3D support
4) No noise reduction, power mastering, remote grading and sharing

Red Giant Colorista Free

Colorista is an amazing product from the prolific mad genius of  rebel filmmaker, Stu Maschwitz. When it was released it was, quite simply, the three-way color corrector that Adobe forgot to build in After Effects. It had primary and secondary color grading tools, skin tools, masking tools and it lived right there in the plug-in window.

The app has matured into an amazingly powerful color finishing tool that lives in most NLEs and After Effects as a plug-in, it’s called Colorista II and it’s US$199.

Red Giant released a free version of the app called “Colorista Free” that has just the three way color correction tool and numeric inputs. But when you combine this with the built-in tracking masks in Adobe Premiere CC 2014, you get a really stable, powerful primary and secondary color correction tool for free.


Kinemax 6k

KineMAX is capable of Capturing and Recording 6K RAW without external recorder. KineMAX is honoured as one of three cinema camera models in this planet. 6K RAW is recorded as KineRAW(.krw) codec which is compressed lossless RAW format developed by Kinefinity. For 4K and lower resolution, it can record Uncompressed CinemaDNG; for 3K and lower resolution, it can record Cineform RAW which is easy to be edited and graded in mainstream DI software. 6K RAW capturing and recording leaves very large room for reframing, trimming, and CG, especially for 4K delivery. At same time, it also features capturing and recording 6K, 4K, 3K, 2K, 1080p in both S35mm frame and crop mode: that means KineMAX can cover from 1080p to 6K, every mainstream resolution in one camera. KineMAX may be the most compact and powerful cinema camera for 6K&4K RAW capturing and recording now.

KEY TECHNICAL FEATURES :

16 f-stops 
KineRAW codec 
100fps SLOW-MO 
4K 4:3 Anamorphic 
Super 35mm
KineStation 
Built-in Cineform RAW 
NEW LOCK-TYPE EF/F MOUNT
KineMOUNT Interchangeable Mount 
CinemaDNG  
3G SDI and HD Digital Display  
M4/3 and S16mm  
LIGHT-WEIGHT AND COMPACT 

PRICE $8000.00 

Davinci Resolve 12 Getting New Editing Features – NAB 2015

Blackmagic Design announced Davinci Resolve 12 here at NAB this week. This new version includes 80 new features and significantly expands its video editing capabilities.

The new update will include significant improvements in the user interface, enhanced video editing including multi-cam, new media management tools including metadata filtering and smart bins, brand new professional audio engine with support for VST/AU plugins, 3D keyer, a new 3D perspective tracker, enhanced curve editing, and more.

Resolve 12 is planned for a July release for $995, but current users can upgrade for free.

New Editing Features:

  • New Interface
  • Metadata filtering
  • Multicam Editing
  • Improved trimming
  • Nesting timelines
  • On-screen controls for motion graphics
  • Customizable transitions with curves editor
  • Real-time audio mixing using recordable fader moves
  • VST/AU plugins
  • Export to Avid Pro Tools
  • Improved media management

Other Features

  • Metadata filtering
  • Enhanced 3D tracker
  • New 3D keyer

Cost

  • Full Version: $995 for new users (free upgrade for current users)
  • Resolve Lite: Free